- Published on
Daz Studio Tutorial: Depth of Field
- Authors

- Name
- MIKAN
Depth of Field
Depth of Field (DoF) is a powerful tool that can elevate the aesthetic quality of your renders in Daz Studio. By introducing a controlled blur (or "bokeh") to the background, DoF creates a sense of depth and focuses attention on the subject, giving your scene a cinematic feel. This effect is widely used in photography and filmmaking to add artistic emphasis and isolate key elements in the composition.
Without DoF, a render may appear flat and overly sharp, lacking the natural focus that occurs in real-life vision. By selectively blurring elements in the foreground or background, you can guide the viewer's eyes to the focal point and enhance the storytelling within your image. Whether you're creating intimate character portraits or expansive landscapes, mastering DoF will bring a professional polish to your work.
In this tutorial, we'll walk through the steps to set up and refine DoF in Daz Studio, transforming an ordinary render into something extraordinary. Let's get started!
Step-by-Step Guide
1. Set Up Your Scene
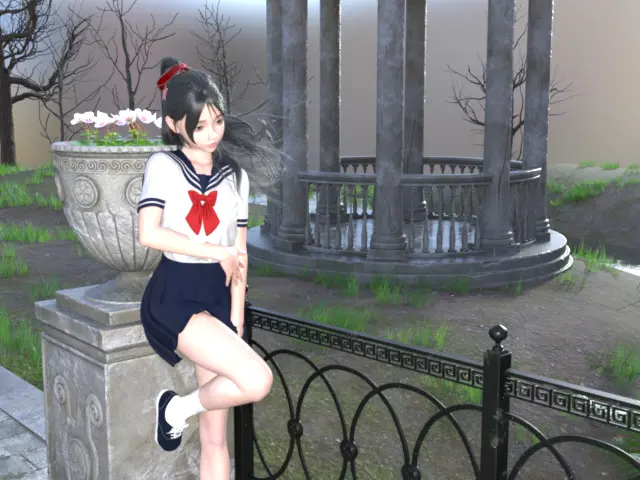
Start by creating a simple scene. For this tutorial, we’ve placed a female character in an old park setting. When rendered without DoF, the image looks crisp, but lacks the depth and focus you want to achieve.
2. Add a Camera
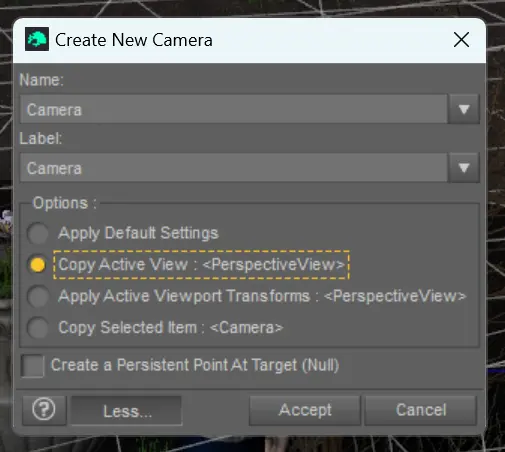
To enable DoF, you need to render the scene using a camera, not the default Perspective View. Create a new camera by navigating to Create > New Camera in the menu. You can duplicate the current Perspective View to match your setup seamlessly.
3. Enable Depth of Field
Once your camera is placed, select it from the Scene tab. In the Parameters pane, go to Camera settings and toggle the Depth of Field option to On.
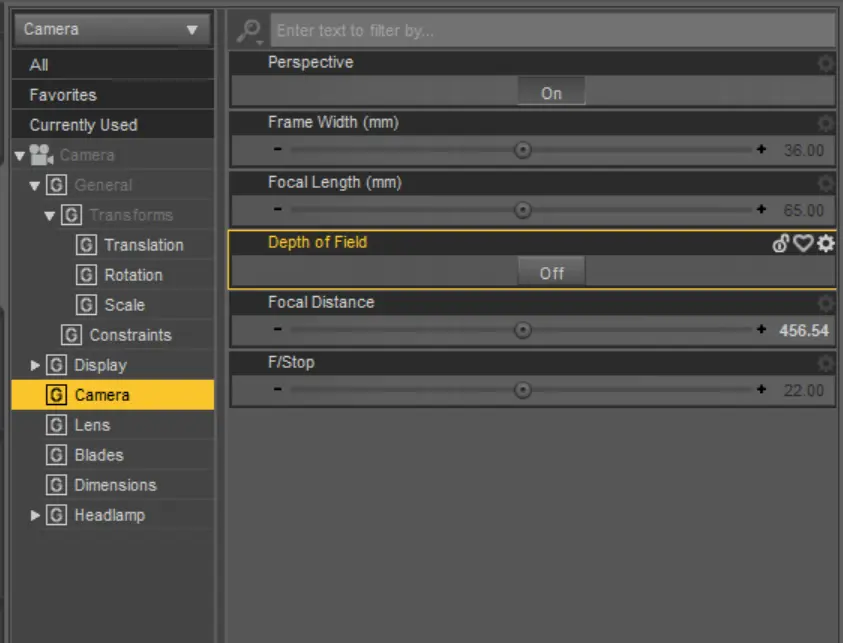
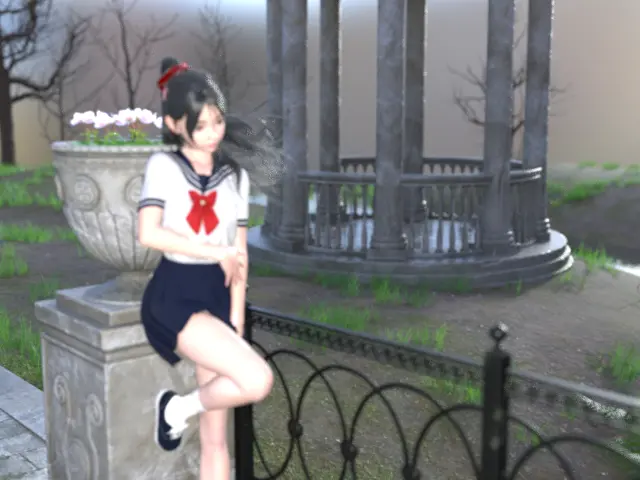
With DoF enabled, you’ll notice parts of the image start to blur. However, this default effect may not align with your desired focal point.
4. Adjust Focal Distance
To refine the focus, adjust the Focal Distance. This parameter determines where the sharp focus is placed in your scene. Use the visual aid in the viewport—a rectangular outline showing the focal plane—to position it on your subject. In this case, we’ve set the focus on the character in the foreground.
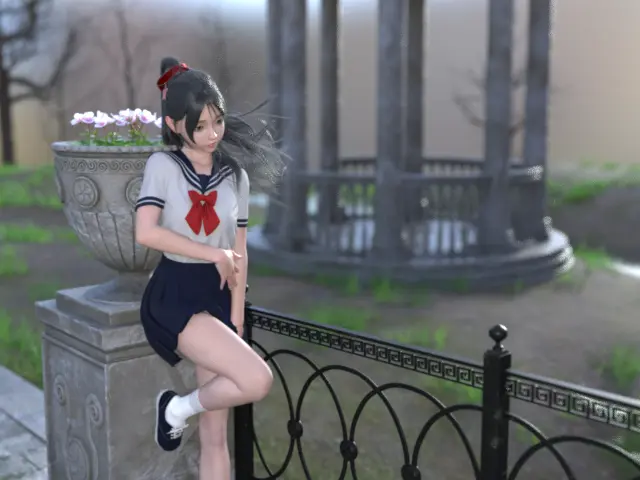
5. Fine-Tune the Aperture (F/Stop)
The F/Stop value controls the intensity of the blur. Lower values create a more pronounced blur by widening the aperture, while higher values produce a sharper image. Experiment with this setting to balance clarity and blur based on your artistic goals. For a subtle effect, an F/Stop around 5-8 works well. For dramatic bokeh, try reducing it to 2-3.
Featured Assets
Here are the assets used in this tutorial to achieve the final look:
- Shiina Character and Expressions for Genesis 8.1 Female
- Sue Yee Half Shawl Long Hair for Genesis 8 and 8.1 Females
- dForce SU JK Suit for Genesis 9, 8.1, and 8 Female
- Old Park Corner
- dForce Angie Cuffed Jeans Outfit for Genesis 9
Mastering Depth of Field in Daz Studio will transform your renders, adding a layer of professionalism and artistic flair. With these tips, you can create stunning visuals that draw the viewer’s attention exactly where you want it. Happy rendering!