- Published on
Importing OBJ Files into Daz Studio
- Authors

- Name
- MIKAN
How to Import OBJ Files into Daz Studio
Importing OBJ files into Daz Studio allows you to work with a wider variety of 3D assets, beyond those available in the Daz Shop. By using publicly available or purchased OBJ models, you can significantly expand the creative possibilities for your projects.
In this tutorial, we'll guide you through the steps to import an OBJ file into Daz Studio and make the necessary adjustments to fully integrate it into your scenes.
For this tutorial, we'll use a model from Sketchfab as an example:
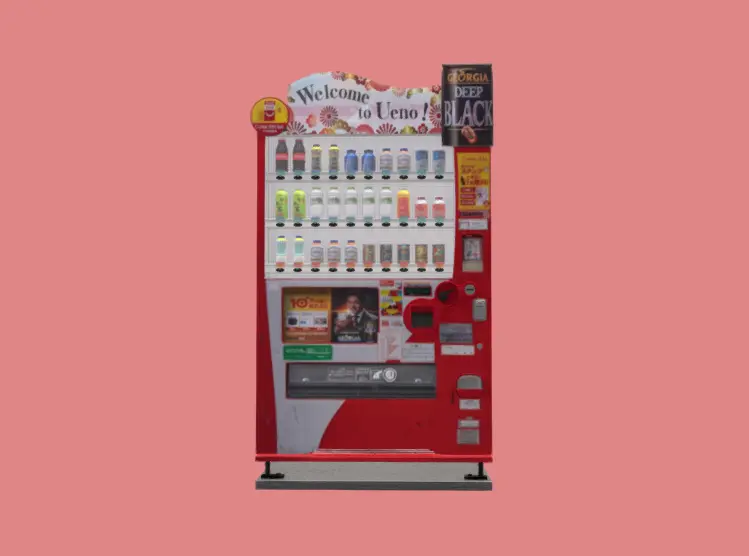
Step 1: Importing the OBJ File
The import process is straightforward:
- In Daz Studio, go to File > Import.
- Navigate to the downloaded OBJ file and select it.
You'll then see the OBJ Import Options dialog.
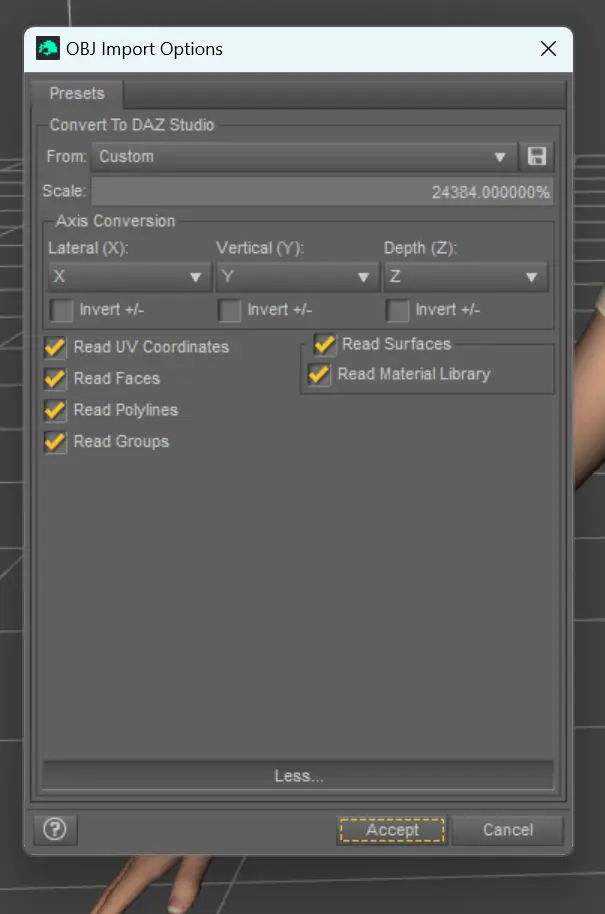
Key Settings:
- Scale: If you know the model's scale, adjust this value to ensure proper sizing within Daz Studio.
- Axis Conversion: In most cases, you can leave this unchanged.
- Other Settings: It's generally a good idea to check all options to ensure a smooth import.
Once you've configured the settings, click Accept, and the model will load into your scene.
Step 2: Dealing with Missing Textures
After importing the model, you might notice that textures are missing. For example:
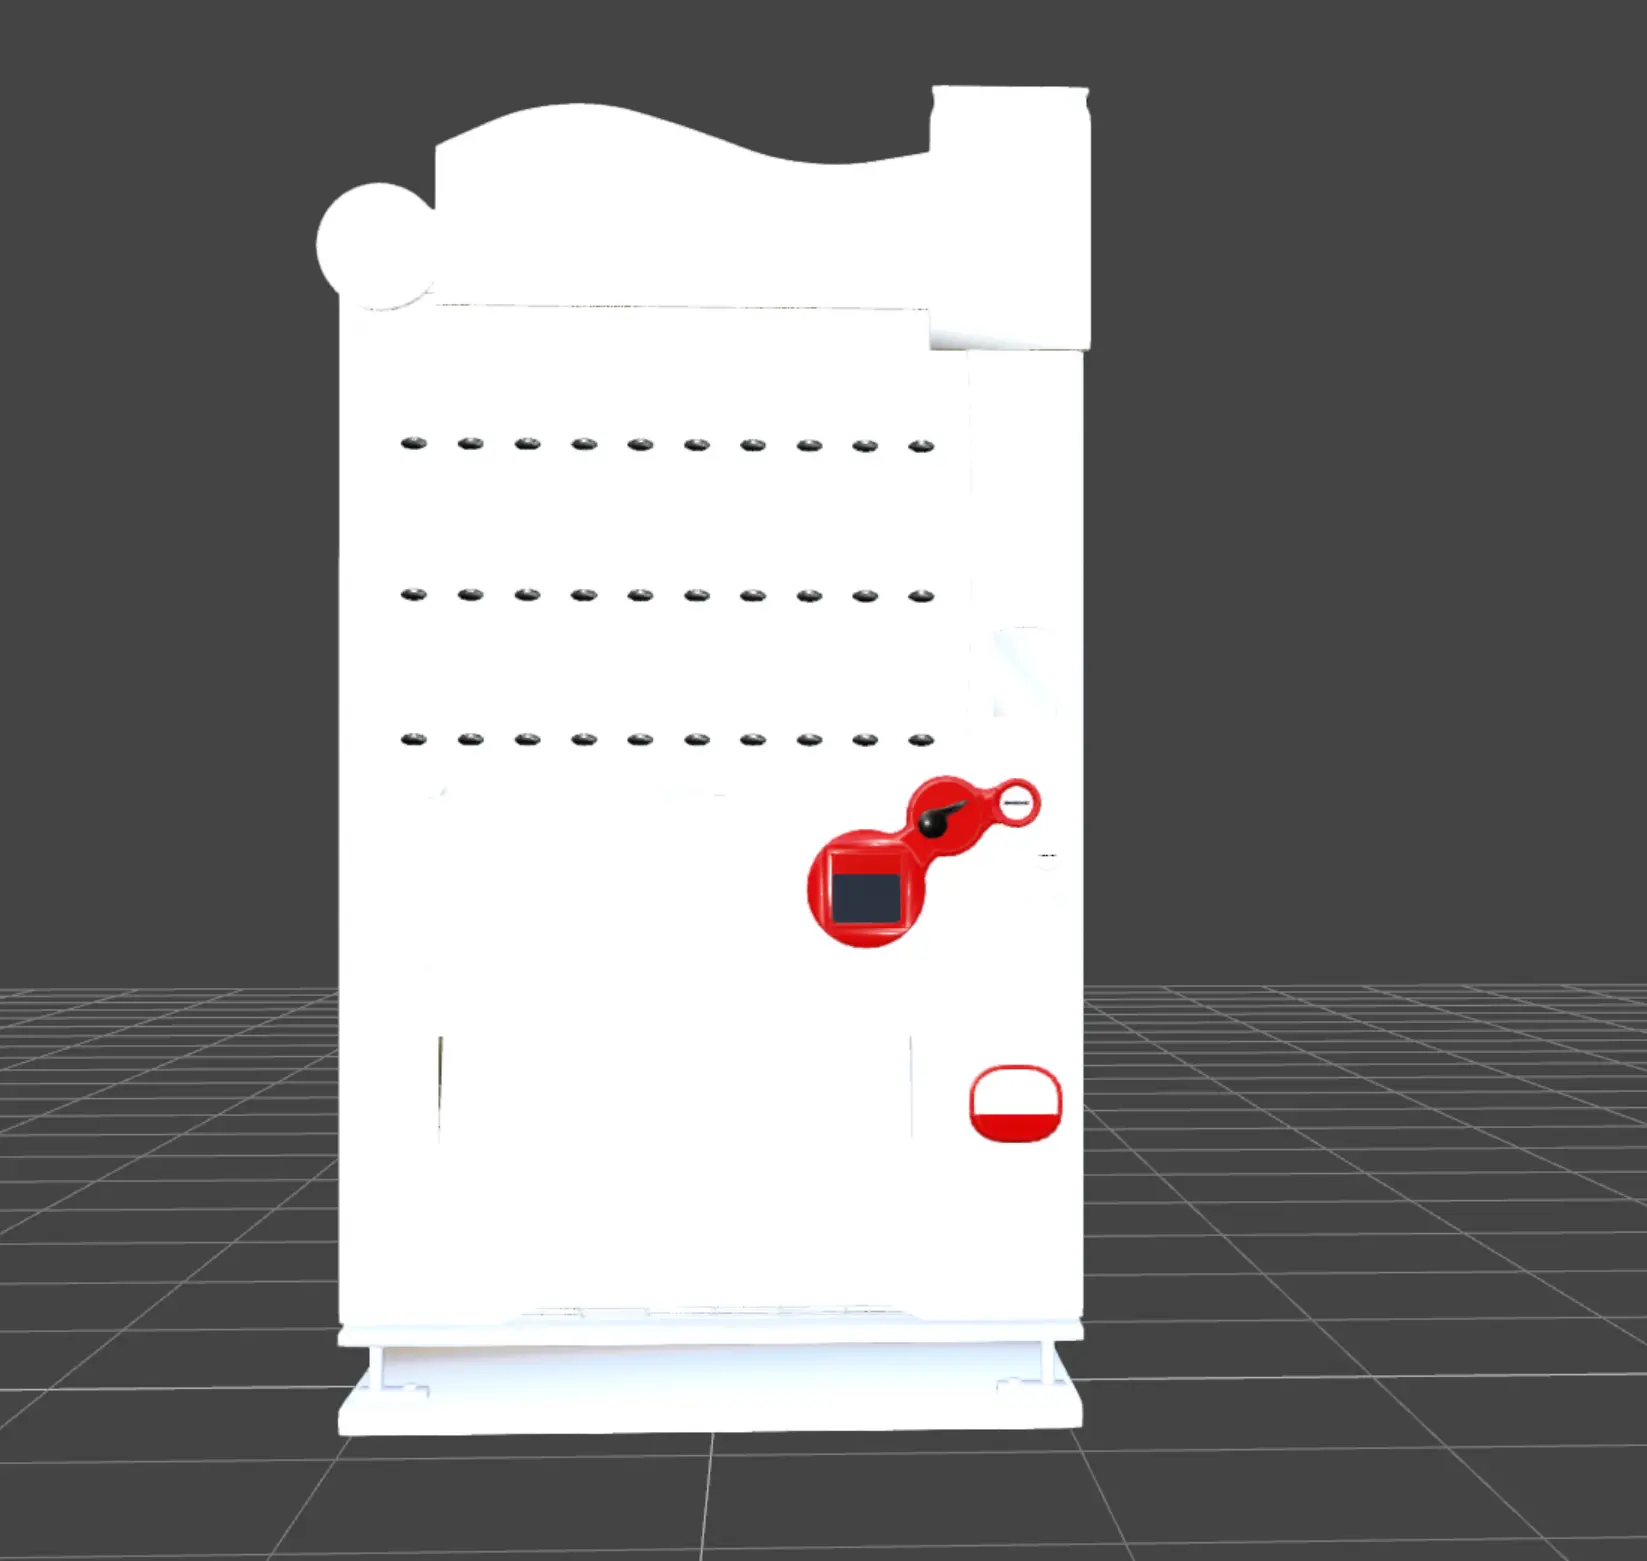
This happens when the OBJ file's associated .mtl file doesn't correctly reference the texture files. Here's how to fix it:
- Use the Surface Selection Tool or the Surface Panel to identify the parts of the model missing textures.
- Open the
.mtlfile in a text editor and search for the corresponding part name. - Check the texture file paths. Often, the issue is caused by incorrect file names or paths.
For this example, the texture file names included spaces, which Daz Studio doesn't recognize properly. Renaming the files (e.g., from Vending 2.jpg to Vending_2.jpg) and updating the .mtl file resolved the issue.
Step 3: Adjusting Transparency and Other Surface Settings
With the textures loaded, you may need to fine-tune certain surface properties. For example, to achieve realistic transparency on a glass surface:
- Use the Surface Selection Tool to select the glass surface.
- Lower the Cutout Opacity value in the Surfaces Pane.
Before adjustment:
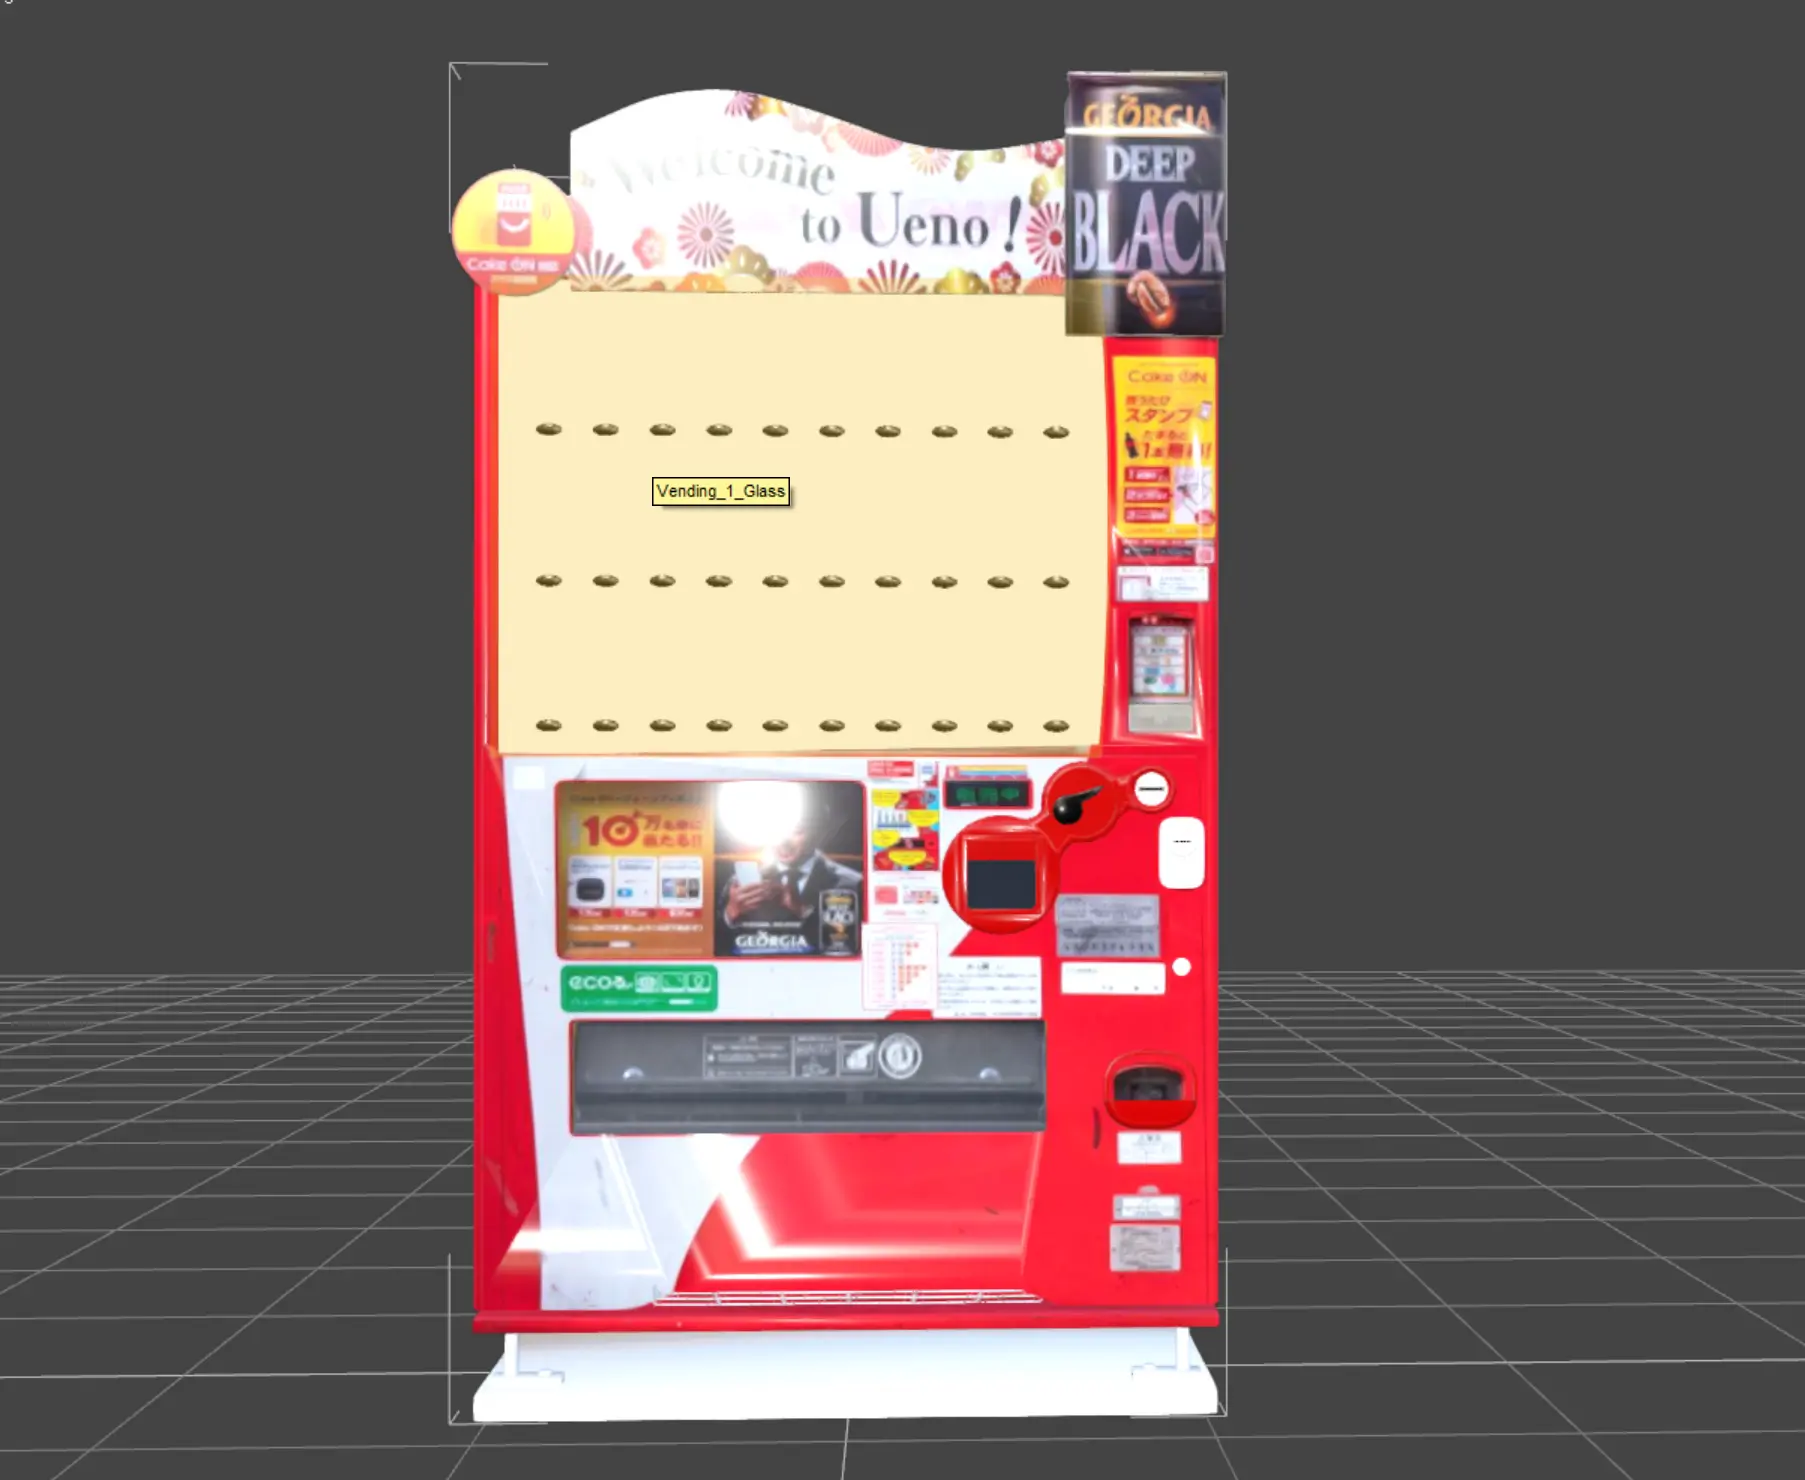
After adjustment:
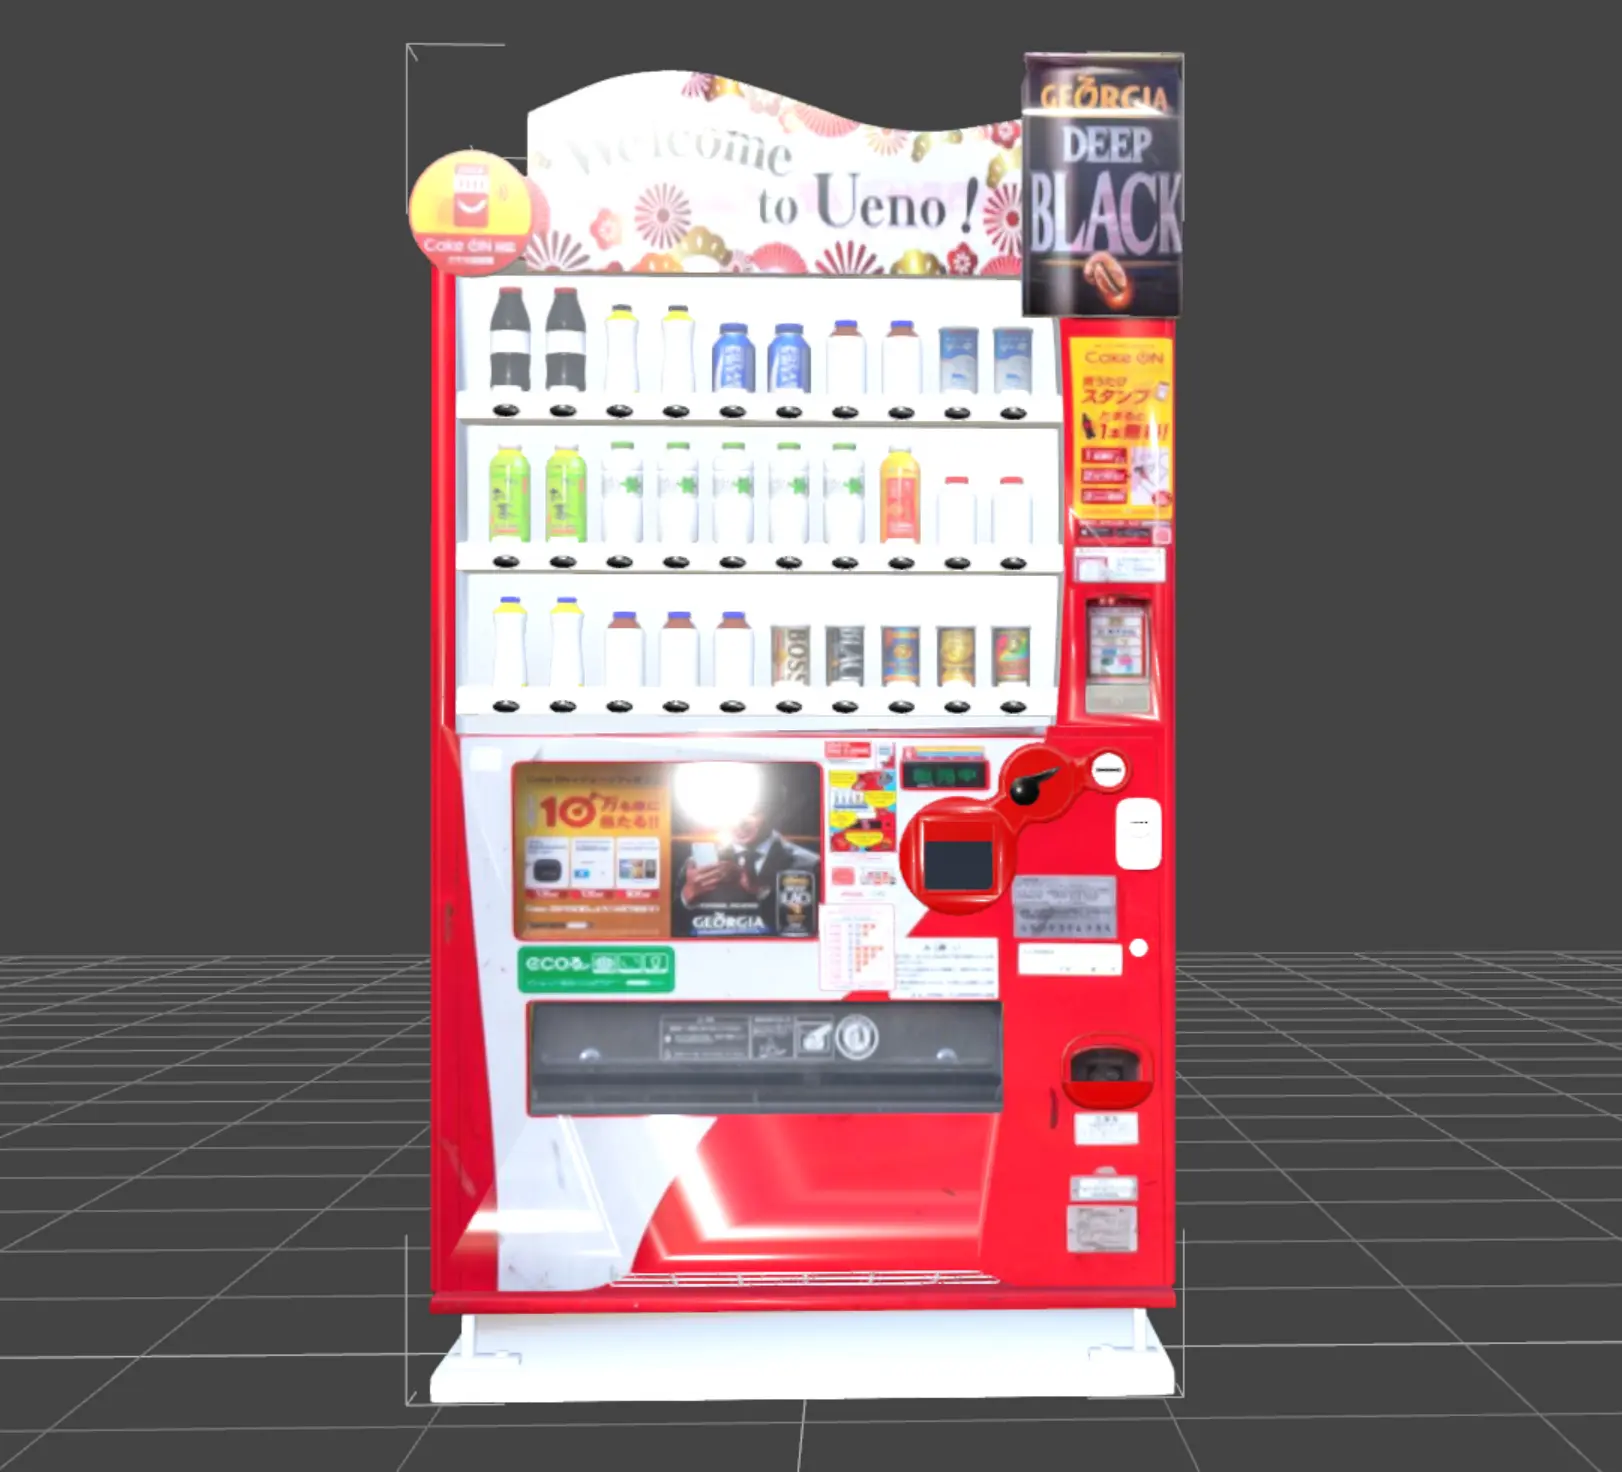
Step 4: Integrating the OBJ Model into Your Scene
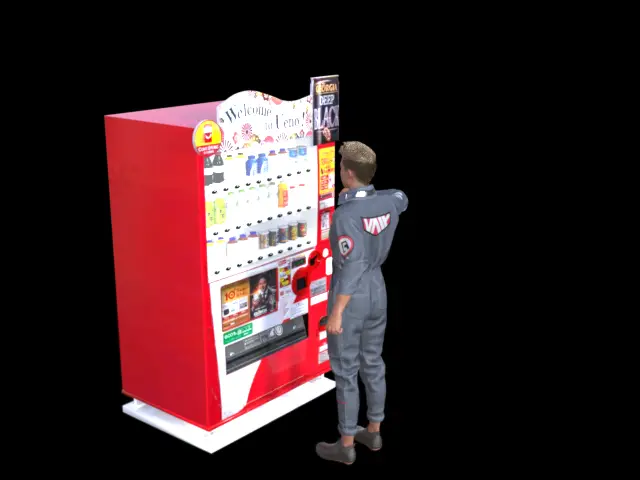
Once your OBJ model is imported and adjusted, it can be integrated into your scenes alongside other Daz Studio assets. For example, you can place your model in a dynamic environment, interact with Daz figures, or enhance it with additional props and lighting.
Here’s an example of the vending machine model incorporated into a scene:
Additional Tips and Notes
Daz Studio supports importing several other file types besides OBJ, including:
- BioVision Files (*.bvh)
- DAZ COLLADA (*.dae)
- Autodesk FBX SDK (*.fbx, *.dxf, *.3ds)
- Poser Files (*.pz3, *.pz2, *.cr2, and more)
By exploring these formats, you can further enhance your workflow and project versatility.
Assets Used in the Example Scene
- Ty for Genesis 9
- Mavick Hair and Beard for Genesis 8 Males and Genesis 9
- Worker Uniform Outfit for Genesis 9
Expanding your toolkit with imported models lets you bring unique ideas to life. Have fun experimenting, and let your creativity shine!
Enjoy!